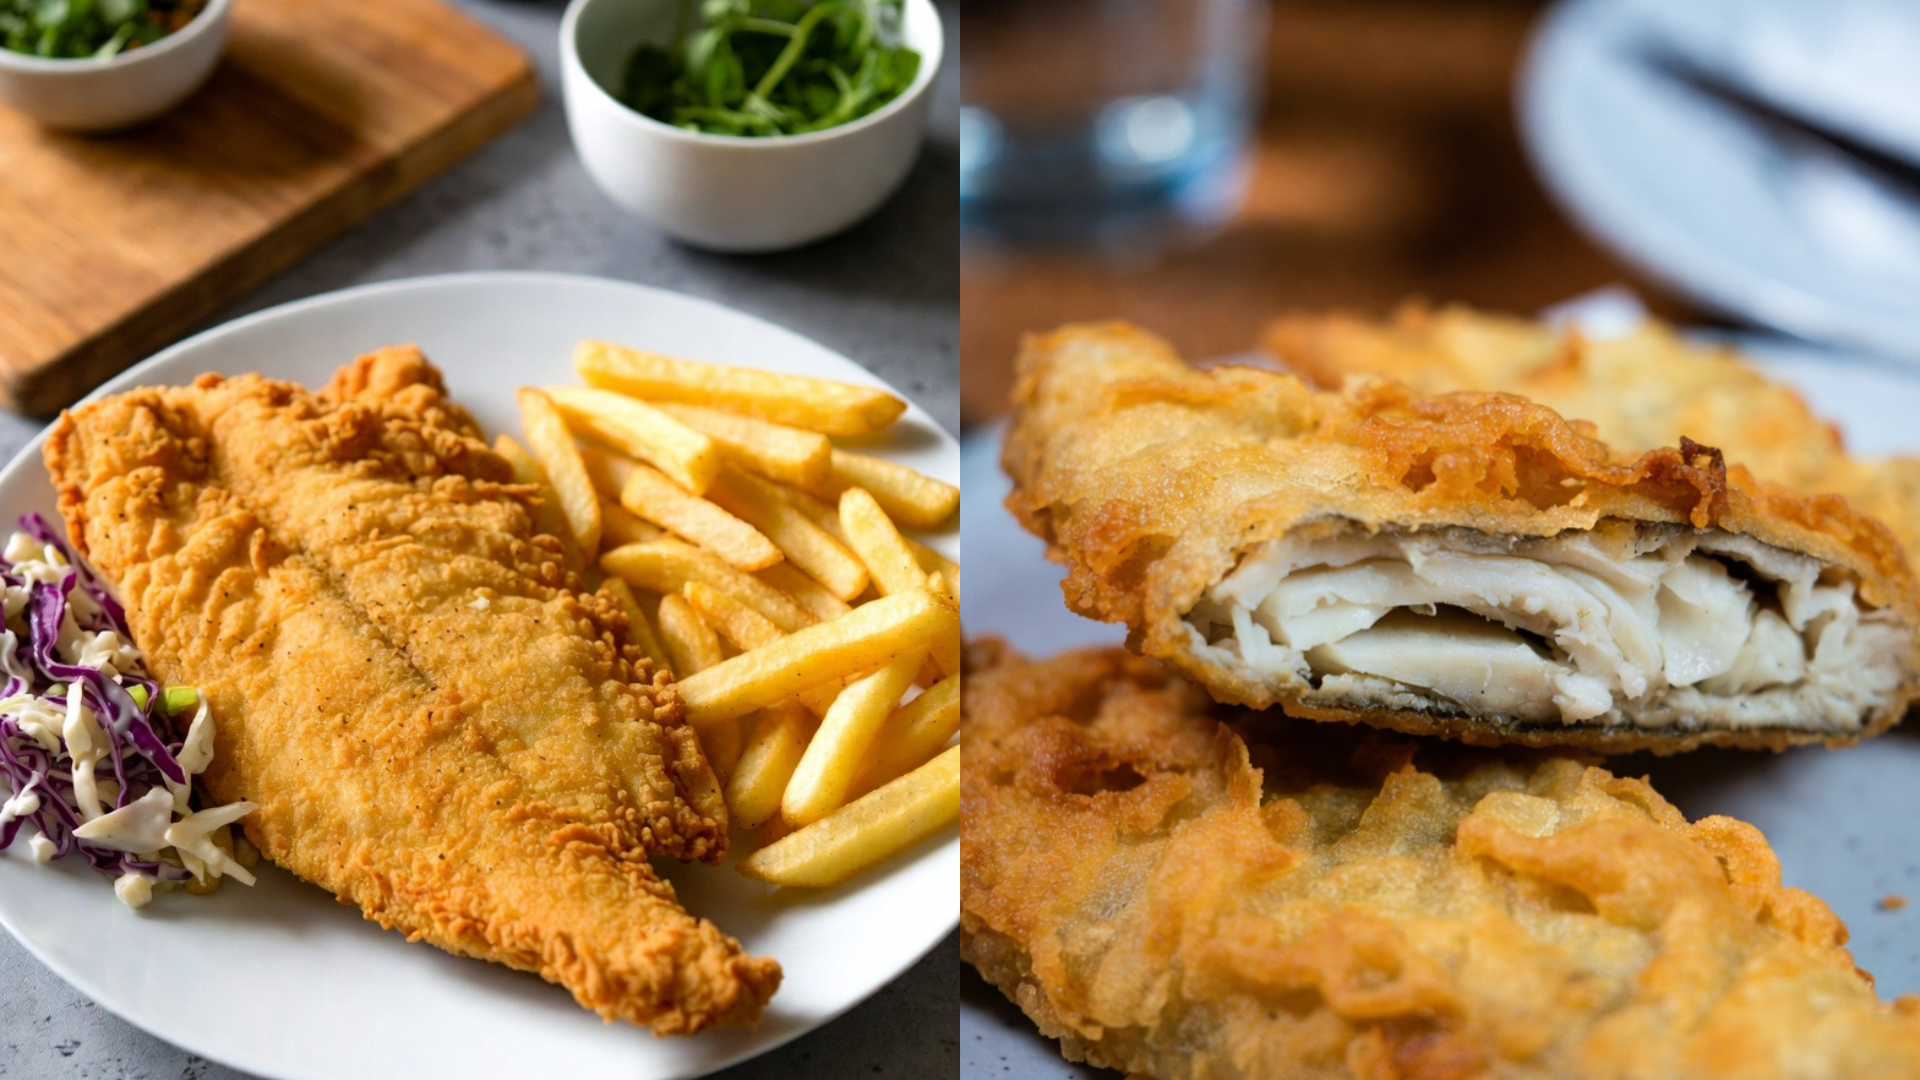
Most people overcook this. Here’s how not to. The difference between greasy, soggy fried fish and a genuinely golden, crisp version comes down to one step: managing oil temperature actively throughout frying, not just heating it once at the start and assuming it stays put.
Golden fried fish recipes fail almost exclusively because of oil temperature drift, not seasoning or batter choice. A properly executed version monitors the oil constantly, fries in batches to prevent overcrowding, and pulls the fish the moment it’s done rather than leaving it in a moment too long out of caution.
Prep time: 15 minutes | Cook time: 20 minutes | Total time: 35 minutes | Servings: 4
Table of Contents
What Makes This Recipe Work
- Oil temperature is checked constantly with a thermometer, not estimated — this is intentional. Even a 20-degree drift changes the fish from crisp to greasy, since oil that’s too cool soaks into the batter instead of sealing it
- Fish is fried in small batches, never crowded — the science here is simple: adding too much fish at once drops the oil temperature sharply, and it takes time to recover, during which the batter absorbs excess oil
- The batter includes a small amount of carbonation — most recipes skip this, but the bubbles create a lighter, crisper structure than a flat liquid base produces
- Fish is patted completely dry before battering — surface moisture creates steam pockets that weaken the batter’s seal and lead to sogginess

Ingredients — What to Buy and Why It Matters
- White fish fillets (1.5 lbs, such as cod or haddock), cut into portions: Firm, flaky white fish holds up to frying without falling apart — flakier fish like tilapia works too, but requires gentler handling during frying.
- All-purpose flour (1 cup), plus extra for dredging: Forms the base of the batter and the initial dredge, which helps the wet batter adhere evenly to the fish.
- Cornstarch (1/4 cup): Blended into the batter for extra crispness — cornstarch fries up lighter and crunchier than flour alone, since it doesn’t gelatinize the same way.
- Cold sparkling water or beer (1 cup): The carbonation is what gives the batter its light, crisp texture — flat water works in a pinch but produces a noticeably denser coating.
- Baking powder (1 tsp): Adds additional lift to the batter as it fries, working alongside the carbonation for maximum crispness.
- Neutral oil with a high smoke point (enough for 2-3 inches in the pot), such as vegetable or peanut oil: A high smoke point is essential — olive oil will smoke and impart a bitter flavor at the temperatures frying requires.
- Kosher salt, for seasoning both the fish and immediately after frying: Salting immediately after frying, while the fish is still hot, is what actually makes the seasoning adhere properly.
Substitution note: Beer adds a subtle malty flavor along with the same crisping effect as sparkling water — either works, though beer gives a slightly more complex final taste.
Step-by-Step Instructions
- Pat the fish fillets completely dry with paper towels. This is the critical step here — any surface moisture creates steam during frying, which weakens the batter’s seal and leads to sogginess rather than crispness.
- Season the fish lightly with salt, then dredge each piece in plain flour, shaking off excess. This thin flour layer helps the wet batter grip the fish rather than sliding off in the oil.
- Whisk together the flour, cornstarch, and baking powder in a bowl. Add the cold sparkling water or beer just before frying, whisking until just combined — small lumps are fine and even preferable, since overmixing knocks out the carbonation that gives the batter its lift.
- Heat the oil in a heavy pot to 350-375°F, using a thermometer to confirm. What’s actually happening at this temperature range is the batter seals almost instantly on contact, locking in moisture while preventing excess oil absorption.
- Dip each floured piece of fish into the batter, letting excess drip off, then carefully lower it into the hot oil.
- Fry in small batches of 2-3 pieces at a time, never crowding the pot. This is non-negotiable — overcrowding drops the oil temperature sharply, and the resulting recovery time is exactly when the fish absorbs unwanted grease.
- Fry for 4-6 minutes per batch, turning once, until deep golden brown and the fish flakes easily. Monitor the oil temperature between batches, adjusting the heat as needed to maintain the 350-375°F range.
- Remove with a slotted spoon or spider strainer and drain on a wire rack, not paper towels. A wire rack allows air to circulate underneath, preventing the bottom from steaming and turning soggy the way paper towels can.
- Salt immediately while still hot. Salt applied after the fish has cooled won’t adhere nearly as well.

Technique Notes for Better Results
- The professional approach here is using a thermometer throughout frying, not just to check the starting temperature — oil temperature drifts constantly as fish goes in and out
- Where most home cooks go wrong is overcrowding the pot to save time, which is the single biggest cause of greasy, soggy results despite otherwise following the recipe correctly
- If your batter isn’t crisping properly, check that the liquid was genuinely cold and freshly opened — flat or warm carbonated liquid won’t provide the same lift
- A wire rack set over a baking sheet, rather than paper towels, keeps fried fish crisp while later batches finish cooking
- For extra insurance against greasiness, let the oil fully return to temperature between batches rather than adding the next batch as soon as the previous one comes out
- Resting the battered fish for a minute before frying allows the coating to set slightly, which helps it adhere better once it hits the oil
Plating and Serving
- Classic malt vinegar and tartar sauce both cut through the richness of the fried coating
- French fries or a simple coleslaw round out the plate with contrasting textures
- Serve immediately after frying, while the batter is at its crispest — fried fish loses texture quickly as it sits
- Arrange on a wire rack or paper-lined platter rather than stacking pieces, which traps steam and softens the coating
- A cold lager or a crisp white wine both work well, cutting through the fried richness without competing with it
Nutritional Profile
White fish provides lean protein with relatively little fat on its own, though the frying process adds meaningful calories and fat through oil absorption. Using a properly maintained oil temperature, as outlined above, actually reduces oil absorption compared to fish fried in oil that’s too cool, making correct technique relevant to nutrition as well as texture. For a lighter version, a light pan-fry in a shallow layer of oil reduces total fat significantly, though the texture will be noticeably less crisp than a full deep-fry. Draining thoroughly on a wire rack, rather than serving straight from the pot, also removes some excess surface oil before serving.

Common Questions, Answered Directly
Why does my fried fish always turn out greasy? The oil temperature was likely too low, either from starting too cool or from overcrowding the pot and never letting it recover. Both lead to excess oil absorption.
Can I make the batter ahead of time? Not recommended — the carbonation that gives the batter its lift dissipates over time, so mix it just before frying for the best texture.
How do I keep fried fish crisp if I’m not serving it immediately? Keep it on a wire rack in a low oven, around 200°F, rather than covering it, which traps steam and softens the coating.
Can I reuse the frying oil? Yes, once cooled and strained through a fine mesh to remove batter debris, though limit reuse to two or three times before the flavor and performance start to decline.
Fire up the fryer this weekend — a thermometer and a little patience between batches are what actually separate golden and crisp from greasy and soggy.